Pastry: Class size and Cookies

(Also posted on http://students.nwcav.com)

After successfully completing the Professional Culinary program, I have moved on to the Pastry kitchen to complete the 2nd part of the full year professional program. There is nothing as comforting as folding ingredients together and baking it in an oven. An initial worry coming back to class was the size of the pastry class – it is huge with 16 students (compared to 9 students last term). Extra tables were brought in for extra stations, there are less space to move around, and having 3 sinks plus one hand wash station can cause a line up during a clean up session, but after the first week of settling in, there is appreciation in having extra people man the dishwashing station and extra hands with helping to scale recipes, the opinions and experiences from everyone is wide and varied and we have learned how not to bump into each other. 16 students works.

There is no doubt that the world of pastry will be defining for me. One of my first impactful moments from class was with our cookie menu development – learning the basic formula for a basic cookie (3 part flour + 2 part fat + 1 part sugar) and the 16 different types of cookies each of us in class came up with. Just a week before class started, I was attempting to make a chewy vegan chocolate chip cookie but instead it turned out solid as a rock. I realized the different type of flours, sugar, fat and ratio of each in the recipe plays a role in how a cookie develops.

My inspiration for the cookie menu development was the Chinese Almond Cookies that is served after a banquet dinner. The crumbliness and texture of the cookie is something I have never attempted at home before.

Here’s my recipe:

300g Cake Flour
100g Almond Flour
267g Lard (or shortening, but lard tastes better)
1/2 t Baking Powder
1/2 t Baking Soda
pinch of salt
140g Sugar
3 egg yolks
2 t Almond Extract
almond slivers to place on top of each cookie before baking
egg wash on each cookie

1. Sift together the flour, baking powder, baking soda and salt.

2. Cream together the lard and sugar, beat in the egg yolks and almond extract.

3. Mix the dry ingredients into the wet until incorporated.

4. Shape into 25g balls, flattened slightly with the back of a spoon or fork, space the balls 2″ apart,  top with almond slivers and egg wash.

5. Bake in a preheated 350°F oven for about 20 minutes, rotating half way, until golden.

One thing I would change for next time is use 1 whole egg instead of just egg yolks to see if that would a less yolky tasting product, but I was pretty happy with this recipe.

Monica-AlmondCookies

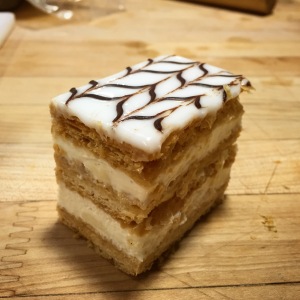
Chinese Almond cookies

Monica-2015ClassCookies

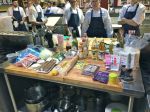
The 16 different cookies developed by each of us in class.

Pastry school: Week 1 – Week 3 in review

Pastry school is flying by faster than I have imagined! Three weeks have already gone by before I got a chance to post a blog on it! My classmates do comment on how much happier I now look in class compared to last term, but I’m a pretty smily person usually so I only imagine that my smile is reaching ear to ear right now. We are in a room with flour and sugar which I cannot imagine not being about to smile in. Every day there is something smelling awesome coming from the ovens.

Unlike the building blocks in the culinary curriculum where we would revisit each foundation learned in the early weeks, the pastry program is more modular. The first week we focused on cookies, during the second week we spent a day on quick breads, another day on creams and custards, another day on Pate a Choux, then we moved into 4 days of laminated doughs, and then 3 days of pies and tarts and a trip to Terra Nova farm to round off week 3. As we were making checkerboard cookies for the 2nd time during week 3, I can barely remember how we have put it together in week 1!

<insert at least 50 of the last 360+ photos I have taken in class in the past several weeks 😛 >

(One thing I would actually like to do more is to take more photos in class, especially the step-by-step process which would help to remember the steps in putting together the checkerboard cookies. It is *kinda* hard when your fingers are covered in dough, but I’ll try to.)

You can only imagine the number of products that we are producing in class. From what me and my partner makes, we get to bring home 1/4 each and the remaining half goes to the food bank. You can also imagine the weight I’m putting on in Pastry and we are not yet into Chocolate week yet!

A few things I’ve been looking forward to (since I have been spying on pastry since last term) – Entremets (cakes! Coming up on week 6/7); Chocolate (week 9/10); Sugar Art (week 11); Alternative Baking (Week 11).

Student blogs from school can be read at http://students.nwcav.com. I’ll be posting there, too, from time to time, minimum 3 blog posts.

So you’re thinking of culinary/pastry school: Whisking and your arm

As I’m writing this post, my right shoulder is a bit stiff, which is why I’d like to point out a few tips to prepare you to start culinary or pastry school about your arm muscles. Having completed culinary school and now almost 20% complete in pastry school I am very well aware of the physicality and stamina needed to be comfortable in the kitchen. As a student you are taught to use your hands when whisking rather than using a machinery to do the job, this is akin to an automotive technician apprentices to use hand tools rather than power tools. Using your hands allow you learn and feel when your product is at the correct stage, stiffness, texture, colour, etc. When you use a food processor or an electric mixer, the changes are very high for the student learner to overmix.

You will whisk … a lot. A few things that whisking is involved: mayonnaise, hollandaise, sabayon, meringues (macarons), whipping cream, souffles – it doesn’t sound like a lot, but it is one of those things that you may be making at least once a week, or more. We made an Italian meringue in class today and luckily it was something that would be impossible to do by hand so we broke out the KitchenAids.

Italian meringue on lemon sabayon tart 
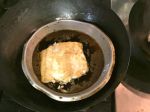
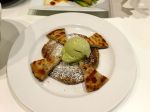
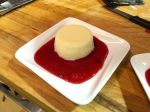
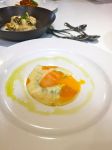
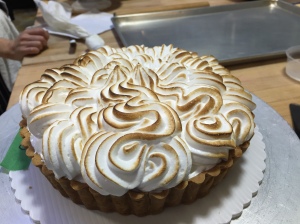
(Lemon sabayon tart with Italian meringue)

The proper technique when whisking is to loosely hold the whisk in your hands so that it is not a tight grip, relax your shoulders, and allow the wrist action of moving back and forth to do the job. You do not want to be whisking so hard that you are clanging the sides of the bowl loudly – doing so would result in a metallic tasting product as you are rubbing off metal-on-metal. But you do not want to be whisking slow in which no air and texture is build up, or in case of sabayon, that the eggs end up cooking in the bowl over the bain marie. You can switch from your dominant arm to your less dominant arm. Practicing on your less dominant arm will give you a boost when you can be ambidextrous in the kitchen. And make sure you have a strong core – stand comfortably but firmly, straight back/not arching/not leaning, and engage your core muscles.

So as you are prepping for culinary school or pastry school make sure you get in several push ups and pull ups each day — you’ll thank me for it. 😉

Things I’ve whisked by hand so far:

Mille Feuille/NapoleonCheese souffleCrispy salmon with bernaise, gnocchi and pesto sauceMy canapes for menu devmacarons

Omgomgomg

‘Tis the morning before our final service for tonight! There are 5 teams between 3-4 people on each team and we are serving our guests and industry guests our own menus that we have developed since black box. Each team has their own 6 courses. We have had two service days so far – the first one on Monday went quite smooth, last night’s was a bit rocky with a couple of dishes sent back, but we fixed it and we pulled through. After each service, we get written feedback from our guests on what they thought which gives us an opportunity to continue to tweak and improve for tonight – the third and final service day. Somewhere in there is also 20% of our entire term’s mark. I’m not kidding if I tell you that I am uber nervous.

IMG_8051.JPG

Week 13 and 14: The final countdown

I haven’t been counting to the last day of class but we only have 5 more class days left in the Professional Culinary program as I write this post. Part of me don’t want classes to end yet. As I am reflecting on the classes from the past two weeks it has been long, exhausting physically and mentally. We have been doing restaurant days, followed by a black box exam and our written exams (from the school’s and from ITA.) This past week (week 14) we were grouped into our final team for the real service days on week 15.

I am amazed about how far I have made it! Several weeks ago I was still anxious about restaurant days and not knowing if I am ready for it. The chefs have laid out a really, really good course plan to bring us this far and looking back on the first two weeks I would have told myself to trust the process and concentrate on each new skill.

We cooked some of the more expensive menu items for 3 restaurant day practices – foie gras, oysters, more lobsters, souffle, beef tenderloins. Each day we would have chef demo a 4 course menu, we prepped the mise en place, and for service the chef would called each station with an order. We would take turn in our partner group to cook and plate. The plates are then brought up to the “pass” for a chef’s final check through to see it is good or needs to be redone. The good plates are then brought to the table and we would wait to get our next order from chef.

(I’m posting this on my phone so here’s a load of pictures to be organized later in a nicer gallery.)

2015/01/img_7799.jpg

2015/01/img_7800.jpg

2015/01/img_7802.jpg

2015/01/img_7807.jpg

2015/01/img_7810.jpg

2015/01/img_7809.jpg

2015/01/img_7812.jpg

2015/01/img_7811.jpg

2015/01/img_7821.jpg

2015/01/img_7822.jpg

2015/01/img_7823.jpg

2015/01/img_7824.jpg

These few restaurant days were tough – new recipes, not much sleep as I was reviewing the new recipes the night before, time pressure when chef calls an order, making sure nothing comes back, and eating cold food (we didn’t eat until all 4 courses were served). My partner and I have never worked in a kitchen before so it was not until day 3 where we finally found our rhythm. There may have been some tears that may or may not have occurred in and out of the kitchen. It is important to have a healthy stress reliever in your back pocket (mine is chocolate.)

A key thing is we’ve made good food and we have pushed ourselves further than we have had to and we are only going to improve with more time in the kitchen. 😉

Next post to focus on the black box and my salmon confit dish.

Week 12: Contrast in Modern Cuisine – Molecular Gastronomy and Macrobiotics

This was an interesting week where we spent two days each in seemingly different end of the spectrum in modern day cuisine – molecular gastronomy versus holistic nutrition and macrobiotics: clean artsy plates versus good for you vegetarian burgers. However there is one thing that is common – good food takes time. With molecular food there are the different parts in food preparation to bring a plate together such as braising meat sous vide for 36 hours on a circulator. With holistic nutrition we talked about soaking, sprouting and fermenting. I love the differences in each and we were able to marry the two together in our Friday menu development with a combo dish with modern techniques and macrobiotics.

As a bonus Chef Katie from this season’s of Top Chef (also a previous grad of Northwest Culinary Academy) was in town for our two days in Modern Cuisine study and gave us insight to her take on molecular gastronomy.

Here is my attempt with a vegan miso soup with a tomato spheres. I had the hankering to make a tomato soup all week. 😉

IMG_7792-0.JPG

The tomato soup was prepared first thing in the morning with calcium lactate added and frozen in large circles. The miso soup was made using miso that was prepared by the class from January. Frozen spheres where dropped in a warm solution of sodium alginate that should form a gel skin around the tomato spheres. I had trouble executing the spheres. Besides getting the correct ratio of calcium to liquid volume, I have also later learned that the pH balance is also important to form a successful sphere. Tomato soup by default is quite acidic. Now you know if you plan to do the same thing in the near future. 🙂

Week 11 continued – Momofuku; Chinese; Japan; and a Menu Dev

Momofuku!

Asia week continued with a nod to David Chang’s Momofuku concepts and recipes. This is not about “Asian fusion” where a dish has soy sauce added to it. Actually, do not use the term Asian fusion, period. We talk about using techniques and flavours to execute dishes that are yummy, and all of the Momofuku recipes we put together were. The Momofuku class is seasonal last year’s class didn’t get to do this, and unfortunately next term’s culinary students won’t have it either, so if you are new student coming in January, ignore the following pictures ;):

Chinese

Chef Ian led the class for Chinese and Japanese cuisine. I was most comfortable and excited with these two days as these were food that were most familiar to me but the recipes are new to me and I’ll definitely be cooking these recipes again and again.

Japanese

Asian Menu Development

My team of three stove made came up with the following dishes for menu development:

I love the Thai Red curry paste recipe I made, there was a bit too much content in the curry, and I should have used more coconut milk to create more sauce (but we had a shortage of coconut milk in the kitchen.) Here’s my recipe for the Thai red curry paste, which is completely vegan 🙂

Thai Red Curry Paste (vegan)

1 T shallot, chopped
1 T garlic, chopped1 T galangal, chopped
1 T red chilies, deseeded and chopped (adjust to taste)
1 stalk of lemongrass, finely chopped
6 Kefir lime leaves, finely chopped
2 T soy sauce
1 t sugar
1/2 t white peppercorn
1/2 lime, juiced

1. Combine all ingredients in a pestle and mortar or a food processor, and process until you get a thick paste. Add to curry recipe with coconut milk.

Another favourite recipe from this menu dev:

Gintara Saikyo Yaki

1 T sake
1 T mirin
3 T miso (red or white, I used a red miso that was made 3 semesters ago in class)
1/4 c sugar

1. Bring the sake and mirin to a boil for 20 secs. Stir in miso and sugar. When the marinate has cooled, allow the black cod to marinate in for at least 30 minutes to 3 days.

2. Sear black cod flesh side down, flip fish over, baste with marinate and finish in oven at 400 degrees F for 10 more minutes.

Here are other dishes cooked up by the class:

And the unending number of dishes left in our sink for clean up, we thought we were never going to ever finish washing dishes from today:

asianmenudev_dishes

Week 9, 10 and 11 recap: A trip around the world from my stove

This is my catch up post so that I could continue blogging about other things so that it doesn’t seem out of order ;). After recovering from the stress of midterms we are back in the kitchen with a renew energy. There is a bit more elbow room around the stove. I have little bits of notes here and there with my thoughts on the last several weeks, but having now wrapped up Asian week, I am able to reflect on the whirlwind tour we’ve made cooking different cuisines. We made a lot of dishes. A lot. And to really re-emphasize it, A LOT. If you have been following my Instagram feed (with only part of it making it to sharing on Facebook) you would see that we ate a lot tasted many flavours. Most evenings I would be skipping dinner. There were a lot of hits, but a couple of misses (I’m not sure I found that the manti from Middle East days was as enjoyable as it was hyped up to be :(). All in all, it was a really good trip to have been on.Week 9: We got started in with a week in Italian cuisine. Fresh and simple – my type of food. Here are a couple of my favourites:

Week 10: A couple of days in the Middle East. I loved the mild use of spices that created so much depth. Some highlights:

Latino days. Those empanadas are sooooo addictive.

Week 11 Monday: We started off the week with an Indian/Thai banquet on a Monday. We had enough food leftover to feed the pastry students for 2 days. 🙂 Since week 10 we have worked as a stove (of 3-4 people) rather than in teams of 2 which allows us to get more recipes done. For the Indian/Thai banquet, not only did the entire class work on several menu items, each stove was also given a specific recipe to accomplish. My stove contributed the Egg Biryani and Mango Raita. This is just a visual feast for the eyes. All I can say is, wow, we did it! (Despite lunch being served at 2pm and the pastry students might have been starving.)

(to be continued – Momofuku day, Chinese, Japanese and an Asian menu development.)

Keeping busy with a few more cakes

Besides culinary school full time, and working on a research paper for class, several draft blogs not yet made public and drafting scholarship applications essay, I have made a few cakes in the last week. After all, this blog is named Cakes and Options. 😉

The following cakes are dairy-free and egg-free, aka vegan. I often get mistaken for being gluten-free as it seems to be the buzzword of the moment, but for your full disclosure, these are not gluten-free cakes.

I’ve made these Guinness chocolate cupcakes with whisky frosting a couple of times now and they always turn out yummy, light and fluffy from the carbonation in the beer. The amount of alcohol used in the frosting is highly flexible depending on the occasions. Recipe can be found here: http://chefchloe.com/sweets/chocolate-beer-cupcakes-with-irish-whiskey-buttercream.html

Guinness cupcakes with whisky buttercream frosting.

I love how the rose technique originating from iambaker.net, now a Wilton cake class staple, always add sophistication to the cake for a really quick method of frosting the cake. I did run into some issues with the first set of roses that I made where I didn’t have a firm enough buttercream, so I remade a batch of American buttercream with enough icing sugar to set them.

Texan-rose cowgirl's mocha cake

I contemplated using a ganache under the white frosting for this Hello Kitty cake, but decided to keep it dairy-free and made a white buttercream which was smoothed several times before applying the fondant over top. I used the ganache for the filling instead. 😉

Chocolate Hello Kitty cake

My favourite go-to chocolate cake recipe after trying many different dairy-free and egg-free options has been Chloe Coscarelli’s. You can find some of her recipes here. Her cookbook is one of my favourite in the kitchen, and I highly recommend you picking one up too.

Baking sugar-free with Xylitol

Last weekend I had the honour to make cupcakes for a mom-to-be who was diagnosed with gestational diabetes. To help accommodate her taste buds and that of the party guests, I did a bit of research in using sugar alternatives for the cakes. With GD, it is important for the mom-to-be to be watching her sugar intake and spikes in insulin levels, but most importantly carbohydrates consumption. Luckily, GD goes always after the baby is born, but being a GD mom requires extra vigilance with your diet.*

*You should always seek health advice from a medical professional. Since I have an asterisk here, I might as well note that in the above picture, fondant decorations were used and fondant is 100% not sugar-free.

There are many natural options to sweeten baked goods from the use of apple sauce, dates, agave and sugar derived from palm or coconut. Stevia (derived from the leaves of a plant with the same name) is becoming a popular choice also. You cannot bake cakes without some form of it being sweet. I would usually cut down the amount of sugar which the recipe calls for by about 20%. Sugar not only adds to the flavours, but also to the tenderness and volume of the cake as it bakes. The opposite of natural would be synthetic such as sucrulose (sold as Splenda), saccharin (Sweet ‘n Low) or asparatame (Equal).

What was important for me as I looked for a sugar-substitute was for something that would not change my end results to much in terms of mouth-feel, structure and flavour, which led me to xylitol. Xylitol can be found in fine grocery such as Sobeys and IGA with the brand name of Xyla. I bought mine from Choices Market. Xyla derives xylitol from North American hardwood, and is GMO-free. It is marketed as “Sweet without the Guilt”, and comes with low carb and low calorie. There are also no after taste. 1 cup of Xyla is a straight replacement for 1 cup of sugar, which makes it a lot easier for me to use my regular recipe without playing around with adjusting ratios with the other ingredients. xylitol_on_green_plateThe xylitol grains are also much coarser than sugar, but lighter. 1 teaspoon of xylitol weighs 4 grams, whereas 1 teaspoon of sugar is 4.2 grams.

Some precautions when using xylitol (as marked on the package) includes not using xylitol excessively as it may cause a mild laxative effect and also to keep it away from your family pets. Xyla as an ingredient is not cheap, the cost of 1 cup of xylitol for me was 10 times the cost of using 1 cup of sugar.

On to the baking part!

I made two versions of lemon cakes – a regular version with eggs and dairy, and a vegan version without eggs or dairy. For both versions of the cupcakes I used the exact amount of sugar that the recipes called for. Both cakes baked perfectly. The results were fluffy cupcakes which you could not tell that a sugar substitute was used.

For the frosting, I made a Swiss meringue buttercream for the regular cupcakes and a vegan frosting using the flour method for the vegan cupcakes. Both of these methods uses granulated sugar rather than icing sugar and both recipes worked well with xylitol. There were no issues to pipe the frosting and tasted smooth. In the Swiss meringue, you would dissolve the sugar in with the egg whites as you whisk it over boiling water and xylitol had no trouble incorporating into the egg whites. Again, you could not taste the sugar alternative in the swiss meringue buttercream. For the flour method frosting I did have some concerns due to the larger size of the xylitol grains since the granulated sugar is beat into submission in a thick paste of cooked flour and milk. This frosting did spend a bit longer in my mixer but the xylitol grains did dissolved into it eventually. (For next time, I’ll choose to melt the sugar in with the flour and milk as it cooks).

Taste test results from my two little testers gave the cupcakes thumbs up although both did not like the flour method frosting (they were only allowed to try the vegan versions) due to it not being as sweet as the American buttercream (made with icing sugar) which they would prefer. But for the more sophisticated palettes who are taller than 4 feet, the flour method works fine.

Xylitol is a great alternative when a sugar-free substitute is needed.